I made these cute little snowmen the other day,
just in time for the Saturday snow.
After all, it is still Winter, so I am allowed to make snowmen!
They were so easy to make.
You need the following supplies:
white/off-white thick or furry felt
black embroidery floss
sewing needle
scraps of red plaid and solid green material
black brads
stuffing
gluegun
Step#1 - cut 2 Dresden pieces out of felt
(I used Stampin Up's new Dresden design die in my Big Shot Sizzix machine)
(Tip:it is best to cut thick or furry felt one layer at a time)
Step#2 - sew around your snowman with a blanket stitch leaving the head unfinished and the curved bottom separated.
(Tip:notice, I started around the bottom curve of one side
and went all the way around to the other curved opening.)
Step#3 - stuff your snowman
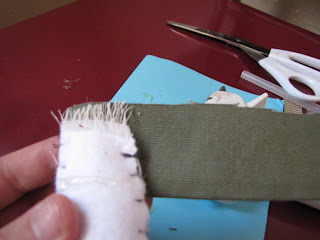
Step#4 - cut strips of your solid green scrap material for the hat
I think I cut a piece that is about 2x6in.
(Tip: make sure it is wide enough to go around his head
and long enough to fold over twice.)
Step#5 - using your glue gun, pipe hot glue in a line
along the edge of your fabric.
Step#6 - immediately fold just enough of the material
over to cover the glue.
Step#7 - repeat step5&6
Now you have a fold for the bottom of your hat.
Step#8 - Now hot glue the hat to your snowman's head.
Step#9 - Wrap & glue the green strip all the way around.
Step#10 - Using your red plaid scrap pieces,
cut scarves and top ties for the hats.
Step#11 - Tie on your scarves and hat ties.
(Trim when finished)
Step#12 - add your black brad eyes by just poking them in.
Now you have some cute little snowmen for next Christmas.
I really enjoyed watching the snow fall,
while I made these cute little felted men.


No comments:
Post a Comment