Saturday, March 31, 2012

To Many Projects,...So Little Time...

I don't know about you, but I always have piles of half-finished projects.  
It has been a while since I last posted. 
 Thought I would let you know that I am still out here in blog land. 
 Recently, I purchased a new computer for the mission field.  
The missionaries I will be working with, suggested I get it now to get all the bugs worked out. 
 It takes me longer to do things because it is differant than my old computer. 
 I was not able to get online from the new computer for a few weeks 
because my wireless receiver did not recognize the new computer.  
All of my contact folders for email and corespondance are missing
 and therefore I have to transfer them all a differant way 
(which I still have to figure out).   Ughhhh!   
Computers are supposed to make our lives easier
 (I am still waiting for that to happen). 

Below you will find a few pictures of some things I have been working on. 
 As I travel in and out of State, as well as, packing boxes for moving,
 I find a moment here or there to work on something creative (which helps me relax a bit).  

Can you figure out what I am doing in these projects?

Wait till you see this card!

Found a piece of furniture free along the side of the road.
Still working on the finished product.
Hope it will be great!

Found some old twist skirts in my closet while packing for my move to South Africa.
Wait till you see what I am doing with them - it is crazy!
What projects are you working on?

Friday, March 16, 2012

Blessings Bed & Breakfast


"To every thing there is a season, 
and a time to every purpose under the heaven:...
 He hath made every thing beautiful in his time: 
also he hath set the world in their heart, 
so that no man can find out the work that God maketh 
from the beginning to the end.
 I know that there is no good in them, but for a man to rejoice, 
and to do good in his life."
~ Ecclesiastes 3:1-3 ~

For a very short "season" I was able to spend time with Ryk & Eve.
They were truly blessings in my life.
Thank you, Lord for Ryk & Eve.
Thank you, Rick & Eve for obeying the Lord by serving others as Christ would have you do!

They say a picture is worth a thousand words, so here are almost a thousand pictures.
Just kidding!
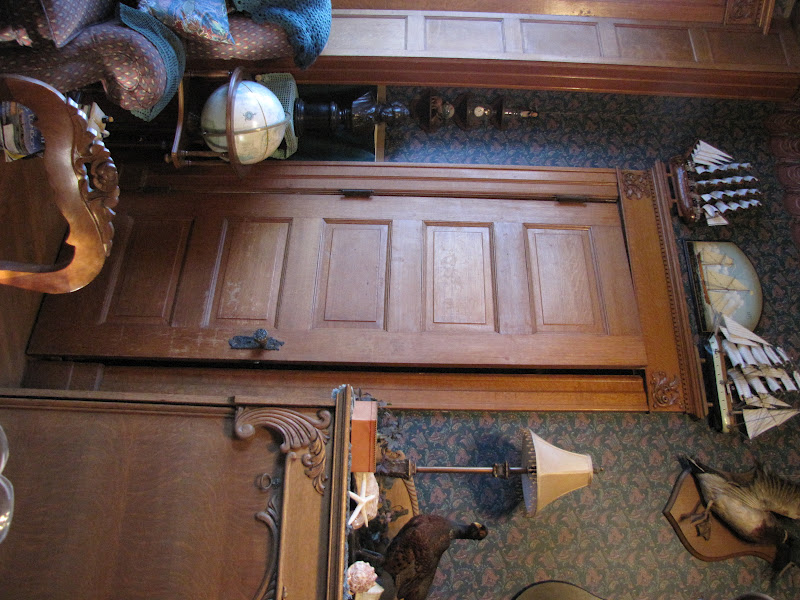
Please enjoy these pictures of my friend's lovely home.


Sitting Room

The Study (& Tornado closet)

Front Entrance & Stairway

Front Parlor

More Front Parlor


Window seat at the bottom of the stairs.

Looking into the Parlor from the stairs.


Top of stairs

Upstairs hallway

Guest Bathroom

My beautiful room!

See the door to the balcony!


Me & the inn keepers

Sitting room


Street View

Front door


Side view toward gardens

Gardens

Isn't the arbor beautiful?

i wonder how this looks in the summer?


SMILE!!!!

Side view


Tornado Closet :)


Wednesday, February 29, 2012

Dresden Design #4 - Large Paper Flowers

I know, you are thinking "another project with the Dresden Plate, really????"
Yes, really!!!
As you can see, all I did was cut out both a large and small Dresden Design pattern 
using SU Ridinghood Red paper.


The centers and under leaf are made from:
Basic Black, So Saffron (a pale yellow), and Old Olive (an off green) paper.

The shapes for the centers are made with a SU flower die for the Sizzix Big Shot, 
but you could use any flower paper punch.
First, I attached the center of the flower together by building the paper center 
and then putting a jumbo silver brad through the entire center piece.
After that, I hot glued 5 red Dreden petals to the center
(see how I matched the large petals with the way the green center petals go).

When the center is attached to the petals, then you can hot glue
 the bottom leaves under the flower
(be sure to only glue the center, so that you can fold the leaves down).
Putting this piece under the flower also helps to stablize it.
When my flowers were made, I just simply attached them to some artificial stems 
that I used from some old silk flowers.
Now you have beautiful handmade paper flowers that your friends may try to steal.

For more projects that use the Dresden Design click the links below:

Tuesday, February 14, 2012

Easy Truffle Recipe


 How to dip truffles into chocolate 
&
Melting chocolate tips
After mixing and freezing the above recipe, 
I prepare to dip the truffles in chocolate.

Melting tips:
- only melt about 1 cup at a time
- microwave method: place in glass bowl in microwave for 1 minute & stir.
   (If the chocolate is not fully melted after stiring thoroughly, place back in and stir at 
   30 sec. intervals.  *Remember that if you cook chocolate too long it looses its 
   consistancy.  So try not to over cook.  It will continue to melt for a while after you get 
   it out of the microwave because the glass bowl is hot).
- prefered method: I do not have a microwave, so I boiled water on the stove.  To melt
   your chocolate~ place a glass coffee mug with 1 cup of chocolate in a glass bowl.  
   Now pour boiling water in the bowl around the coffee mug.  Let sit for about a minute 
   and then stir. Your chocolate will become silky smooth the more you stir.  I love melting 
   chocolate this way,  because I don't waste any and it is melted perfectly (no overheating   
   here).

Now dip your truffles!


Helpful hints:
~ be sure that your truffles are frozen or they will be too soft to dip properly
~ keep a metal spoon in your chocolate (it helps to conduct the heat 
and keeps it from hardening faster)
~ dip using a small condiments fork or shishkabob skur


I dip the truffles and place them right onto
mini cupcake papers.

my Christmas  truffles - Yum!!!
 Place your choice of nuts, sprinkles, coconut,
or whatever you want on top.


Package in an airtight bag or container.
*They only last about a week on the counter, so freezing is suggested.

Hope your Valentines day was as sweet as my truffles!