Saturday, December 28, 2013

Tidings of COMFORT & JOY - Ornament


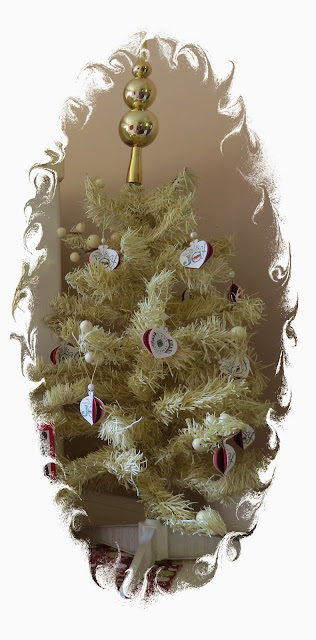
This is one of the simplest ornaments I have made.

SUPPLIES - 
- white, red, & green cardstock
- green ink 
- Christmas greetings
- red glitter pen
- ornament paper punch
- gold cord
- pearl bead
- double sided tape/Mono Adhesive


INSTRUCTIONS- 
STEP 1 : Stamp your Christmas greetings onto the white cardstock. 
              You should have a front & back for each ornament.

STEP 2 : Use the red glitter to accent the stamped images. Set aside to dry.

STEP 3 : After the images are dry, punch them out using the ornament punch.
              (I used Stampin' Up's ornament punch.)
   
STEP 4 : Then punch 2 red & one green for each ornament you want to make.


STEP 5 : Adhere the layers together with the double sided/Mono adhesive.

STEP 6 : Use a large needle or piercing tool to poke a hole in the top.

STEP 7 : Put the gold cord through the hole and then through the bead.
              Knot the gold cord at the top.

STEP 8 : Fold the white and red cardstock a little so that the ornament is
              no longer flat, but 3d.
(I made these ornaments as a gift for our Ladies Christmas Tea.)


Joy Wreath - Ornament


In review of the lesson from the week before & the Wreath Card,
we made this cute ornament.
We reminded the kids that JOY comes from knowing Christ as Saviour. 
Then we talked about the joy and rejoicing surrounding the birth of Christ.

SUPPLIES:
- 16 green "pony" beads
- 7 smaller skinny red beads
- 3 small round red beads
- 8in piece of craft wire
- "JOY" charm
- 6in piece of red ribbon
- wire cutter
- long nose pliers

INSTRUCTIONS:


STEP 1-  String your beads onto the wire.  
              Hold one end of the wire, so that the beads will not slid off.
              2 green, 1 sm. skinny red, 2 green, 1 sm. skinny red, 
              & repeat pattern till all the beads are used.

*Tip: We did this craft together.  I had a bunch of review questions to ask and as they answered them, everyone got beads to put on the wire, until all of the beads were on.


STEP 2 - Make your wreath shape by twisting the wire together at the top.
STEP 3 - String the 3 small round red beads onto one side of the wire after it
               is twisted in place.
STEP 4 - Attach the "Joy" charm just below the red beads.
STEP 5 - Cut the wire shorter and use the pliers to curl the wire behind the 
              "Joy" charm.
STEP 6 - Curl the other side of the wire into a hanger for the ornament.


STEP 7 - Make the bow by forming it like the picture below.


STEP 8 - Put the bow in place and attach it by twisting the wire hanger around                   the bow to hold it into place.


Now you have a cute little ornament to remind you 
of the Joy of knowing Christ as Saviour
 and the symbol of everlasting life (the evergreens) 
and the blood of Christ (red berries) shed for you!


MERRY CHRISTMAS!


Luke 2:10 & 11 
"And the angel said unto them, Fear not: for, behold, I bring you good tidings of great joy, which shall be to all people.
For unto you is born this day in the city of David a Saviour, 
which is Christ the Lord."


Sunday, December 22, 2013

Holly Wreath Card

There are always special projects to do in Sunday School or Junior Church as Christmas is approaching.

I have 3  different things that I have done this year.

The first is this wonderful wreath card 
that we made a few weeks back.

When you teach the children about Christmas, 
you want to show them that the true focus
is about the birth of our Savior.

Below, you will find 
step-by-step instructions and online printables 
to help you have this project ready for children or adults.


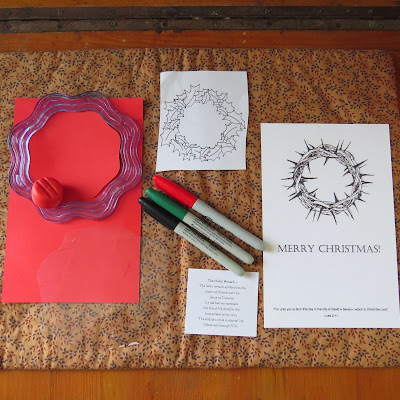
SUPPLIES:
- red cardstock 4 1/4 X 5 1/2 inches
- white cardstock 4 1/4 X 5 1/2 inches 
   (printed with the Wreath Card base/inside)
- one wreath from the Holly Wreath Template
- something to cut out a window on the red 
  cardstock.
   (I used my Creative Memories tools, but you could just      
    trace a cup and then cut the shape.)
- cellophane for the window piece 
   (I used the plastic from a bouquet of flowers.  You could 
   use an overhead transparency, plastic packaging, or 
   purchase cellophane.)
- a copy of the Wreath poem
- red, green, & black Sharpie
 (I suggest that you use the Sharpie brand, because it is
  more permanent and dries faster than others.)
- brown crayon or colored pencil
- double-sided tape
- glue stick (optional)

STEP-BY-STEP INSTRUCTIONS
1. Cut a window in the top half of your red cardstock.


2. Cut your cellophane a 1/2 inch larger 
than the size of your window.


Set aside your red cardstock.

3. Center your cut cellophane piece over 
your Holly Wreath Template.
(use one hand to firmly hold it in place)

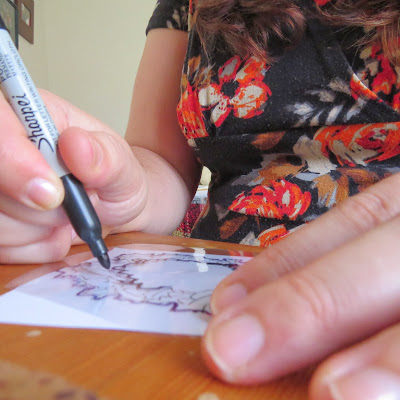
4. Trace the Holly Wreath Template with the black Sharpie.


While the children are coloring talk about how
 the evergreens in the wreath represent the everlasting life 
we can have through trusting in Christ as Saviour.

Then ask them what they think the red berries represent.
Yes, that's right, the blood that Christ shed on Calvary for our sin.


5. Use the green Sharpie to color in the holly leaves.
6. Use the red Sharpie to color in the berries.
Set aside the colored cellophane.

7. Use a brown crayon or colored pencil to color 
the crown of thorns on the white cardstock.

8. Use a glue stick or double-sided tape 
around the inside edge of the window.

9. Center your wreath on the inside of the window over the crown of thorns and adhere by pressing down.

10. Use double-sided tape on the left-hand vertical edge to adhere the red to the white cardstock.
This makes your card.
Below is the best tape that I have found. 
This tape sticks to everything (metal, glass, walls, cardboard, paper, ceramic,...
so be sure to line it up well.
You may be able to find something similar at the craft store.
This heavy duty tape is always red, so look for a red roll of double-sided tape.

11. Use the glue stick or double-sided tape to adhere the Holly Wreath Poem to the front of your card.

This is what your finished project should look like.