Showing posts with label party decor. Show all posts

Tuesday, August 6, 2013

Marvelous Medallions and Glorious Globes

Some ladies from church and I got together 
to get things ready for our upcoming banquet.


We decided on a 
color scheme : browns, gold, & green
and then had the idea to make these medallions & globes.

The medallions for this project are:
 8 x 4in and 8x3in pieces of cardstock.

The following is a tutorial from this project with medallions, but they are put together the same way.
~~~
Step 1 - cut your paper
You will need 2 lengths of paper and 2 circles for every medallion.

Step 2 - score your paper every 1/2 inch.

Step 3- attach two pieces together with doublesided tape.
(I stapled & glued the ones for the project you are seeing, 
but you could use hot glue instead).
Be sure the folds match up.

You should have a round circle like you see above.


Step 4 - using your hand, gently bring the center together 
and forcing the outer edge out.
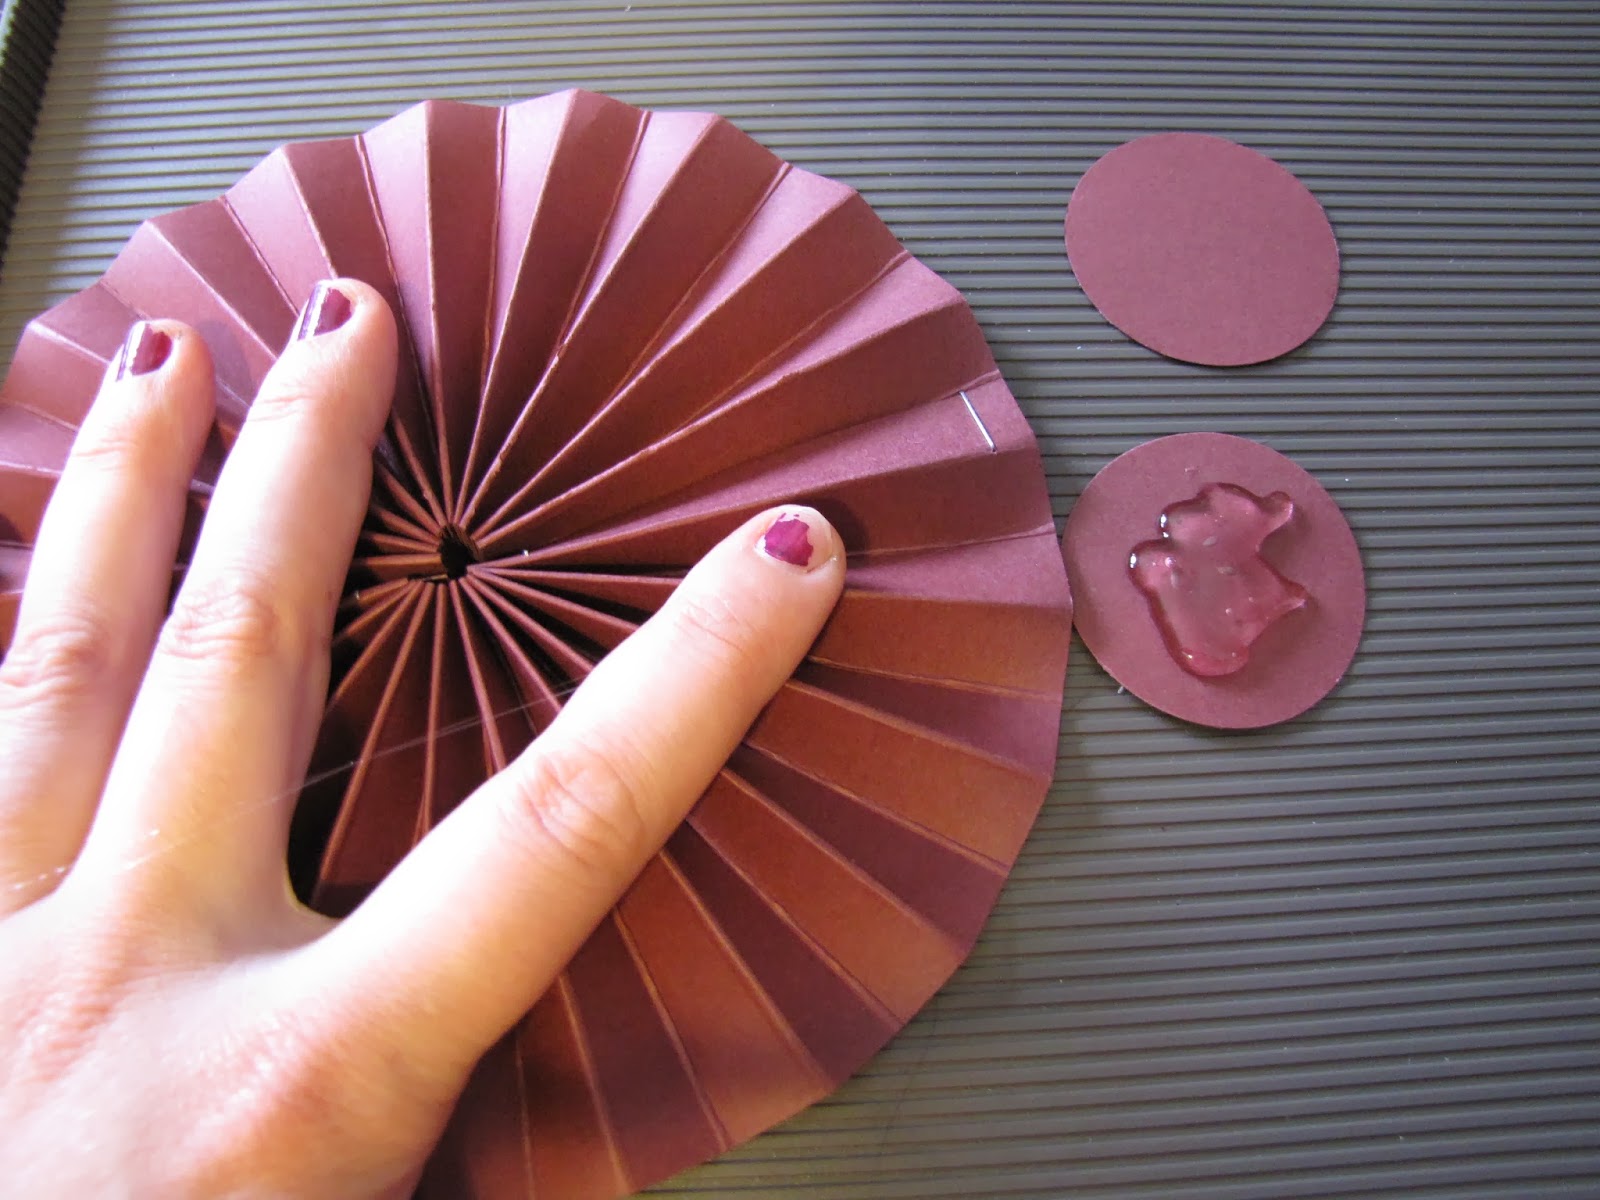

Step 5 - holding the medallion down with one hand, 
hot glue circles on both the front and back 
to make the medallion hold its shape.

After gluing them together, I was surprised how sturdy they were.

*I always glue smaller circles on my medallions, 
then when I know what project I want them for, 
I glue other things to the front & ribbon 
or string to the back or through a hole in the top.
This banner was what I did for one of my medallion projects.

This is what I did for this project.
We made them in diffarent colors with an Africa map on one side
and a soul winning verse on the other.
Now that they are made we can use them for a multitude of things,
change the map or verses.
We could also paint them a differant color.
The possibilities are endless!!!

Now for the glorious globes-
these things are so fun to make and decorate.
Step 1 - print off your globe (look for the link below)
I printed mine off on craft colored cardstock.

Step 2 - score all of the folds & tabs.


Step 3 - use adhesive and follow directions 
to put the top and bottom of your globe together.

Step 4 - *** BEFORE attaching the top to the bottom
be sure to attach a string for hanging through the top.
Then, attach the top to the bottom.


Step 5 - color or paint your globe

I used Sharpies, metalic markers 
& then coated the whole globe with Modge Podge.
The MP gave it a nice glossy finish.

Helpful Hints to make this project:

~ I got the globe pattern from this site:
It was so easy to make and you can print it out on any paper.

~I prefer heavy cardstock or cereal boxes.

~The best thing to use for adhesive is the heavy double sided tape.
*Regular double slided tape only holds for a while.
You need to buy the "red stuff".
Mine is from Stampin Up, but I found some at the local craft shop.
Just go in and look for the double sided tape on a roll that is red.
This stuff will stick to anything and once you have it stuck there is no way to fix it,
so be careful as you adhere the pieces together.

- String for hanging both the medallions & globes should be long so that you can use it for anything.
You should also use clear fishing twine or a color that blends with the walls.
We have found that using pretty cord or string actually takes away from the beauty 
of what you made and also makes it look cluttered.

As you can see, we grouped our marvelous medallions & glorious globes together
and then hung them at different lengths.

They made the perfect decor for our soul winning banquet!


Wednesday, February 29, 2012

Dresden Design #4 - Large Paper Flowers

I know, you are thinking "another project with the Dresden Plate, really????"
Yes, really!!!
As you can see, all I did was cut out both a large and small Dresden Design pattern 
using SU Ridinghood Red paper.


The centers and under leaf are made from:
Basic Black, So Saffron (a pale yellow), and Old Olive (an off green) paper.

The shapes for the centers are made with a SU flower die for the Sizzix Big Shot, 
but you could use any flower paper punch.
First, I attached the center of the flower together by building the paper center 
and then putting a jumbo silver brad through the entire center piece.
After that, I hot glued 5 red Dreden petals to the center
(see how I matched the large petals with the way the green center petals go).

When the center is attached to the petals, then you can hot glue
 the bottom leaves under the flower
(be sure to only glue the center, so that you can fold the leaves down).
Putting this piece under the flower also helps to stablize it.
When my flowers were made, I just simply attached them to some artificial stems 
that I used from some old silk flowers.
Now you have beautiful handmade paper flowers that your friends may try to steal.

For more projects that use the Dresden Design click the links below:

Tuesday, February 14, 2012

PERFECT LOVE

The theme for girls camp this weekend is
TRUE LOVE = KNOWING JESUS.

I don't really get to help very much with the camp program anymore since I am mostly busy raising support to go to South Africa as a missionary.

God has been impressing upon my heart the fact that He alone has perfect love.
Many teen girls struggle with the desire to find love.
They normally look in all of the wrong places.  

This banner will be moved from my wall this week and placed on the camp bulletin board.
It will serve as a reminder that God's love is perfect.
"Perfect love casteth out fear" - I John 4:18
"If we love God, love is perfected in us" - I John 4:12
We can conquer anything with His love - Romans 8:37
...and many more.

How to make the PERFECT LOVE Banner:
Step 1: Cut out a heart shape for each letter on the banner.
(I used the Creative Memories Heart template 
on Stampin Up Designer double sided Scrapbook paper.)

Step 2: Cut a letter frame out of plain colored card stock for each heart.
(I used a variety of colors and cut it using another CM template.)

Step 3: Use a distressing tool on the inside and outside of each frame.
(This makes that layer of paper really stand out from the base.)

Step 4: Lettering :  I used Stampin Up Chip boards letters (as you can see, some are the actual letters and others are the piece that the letter comes out of).  Color each with a red Sharpie.

Step 5: Put the banner together by- 
a. Hot glueing ribbon through the center of each of the hearts on the top layer 
                    (through the word "perfect") on the banner.  Leave space between each 
                     heart.
                 b. Add the second layer ("love") to the banner by gluing the tips pf the hearts 
                     to the sides of the hearts on the first layer (see above photo).
                 c. Glue the word frames on top of the lace ribbon and heart base.
                 d. Punch a 2 1/2 in. circle out of white cardstock for behind each letter and
                     cover the back of each frame letter with white card stock.
                 e.Glue the letters to the banner.
Step 6: Embelish, embelish, embelish!!! (I used stuff I had laying around the craft room.)


To view more about the PERFECT LOVE Banner CLICK HERE

Along with this fun banner project, I made a few other things.
Like the fiber colored hearts (in the picture above and below).
I also used SU Digital studio to design and print off a bunch of Bible verses 
that go with the "Perfect Love" theme.

We will also hang some of these woven ribbon hearts in the windows.
(For instructions on how to make them click here)


Did you do any special Valentine projects?
How has God shown His PERFECT LOVE to YOU?