

Some ladies from church and I got together
to get things ready for our upcoming banquet.

We decided on a
color scheme : browns, gold, & green
and then had the idea to make these medallions & globes.
The medallions for this project are:
8 x 4in and 8x3in pieces of cardstock.
The following is a tutorial from this project with medallions, but they are put together the same way.
~~~
Step 1 - cut your paper
You will need 2 lengths of paper and 2 circles for every medallion.
Step 2 - score your paper every 1/2 inch.

Step 3- attach two pieces together with doublesided tape.
(I stapled & glued the ones for the project you are seeing,
but you could use hot glue instead).
Be sure the folds match up.

You should have a round circle like you see above.

Step 4 - using your hand, gently bring the center together
and forcing the outer edge out.
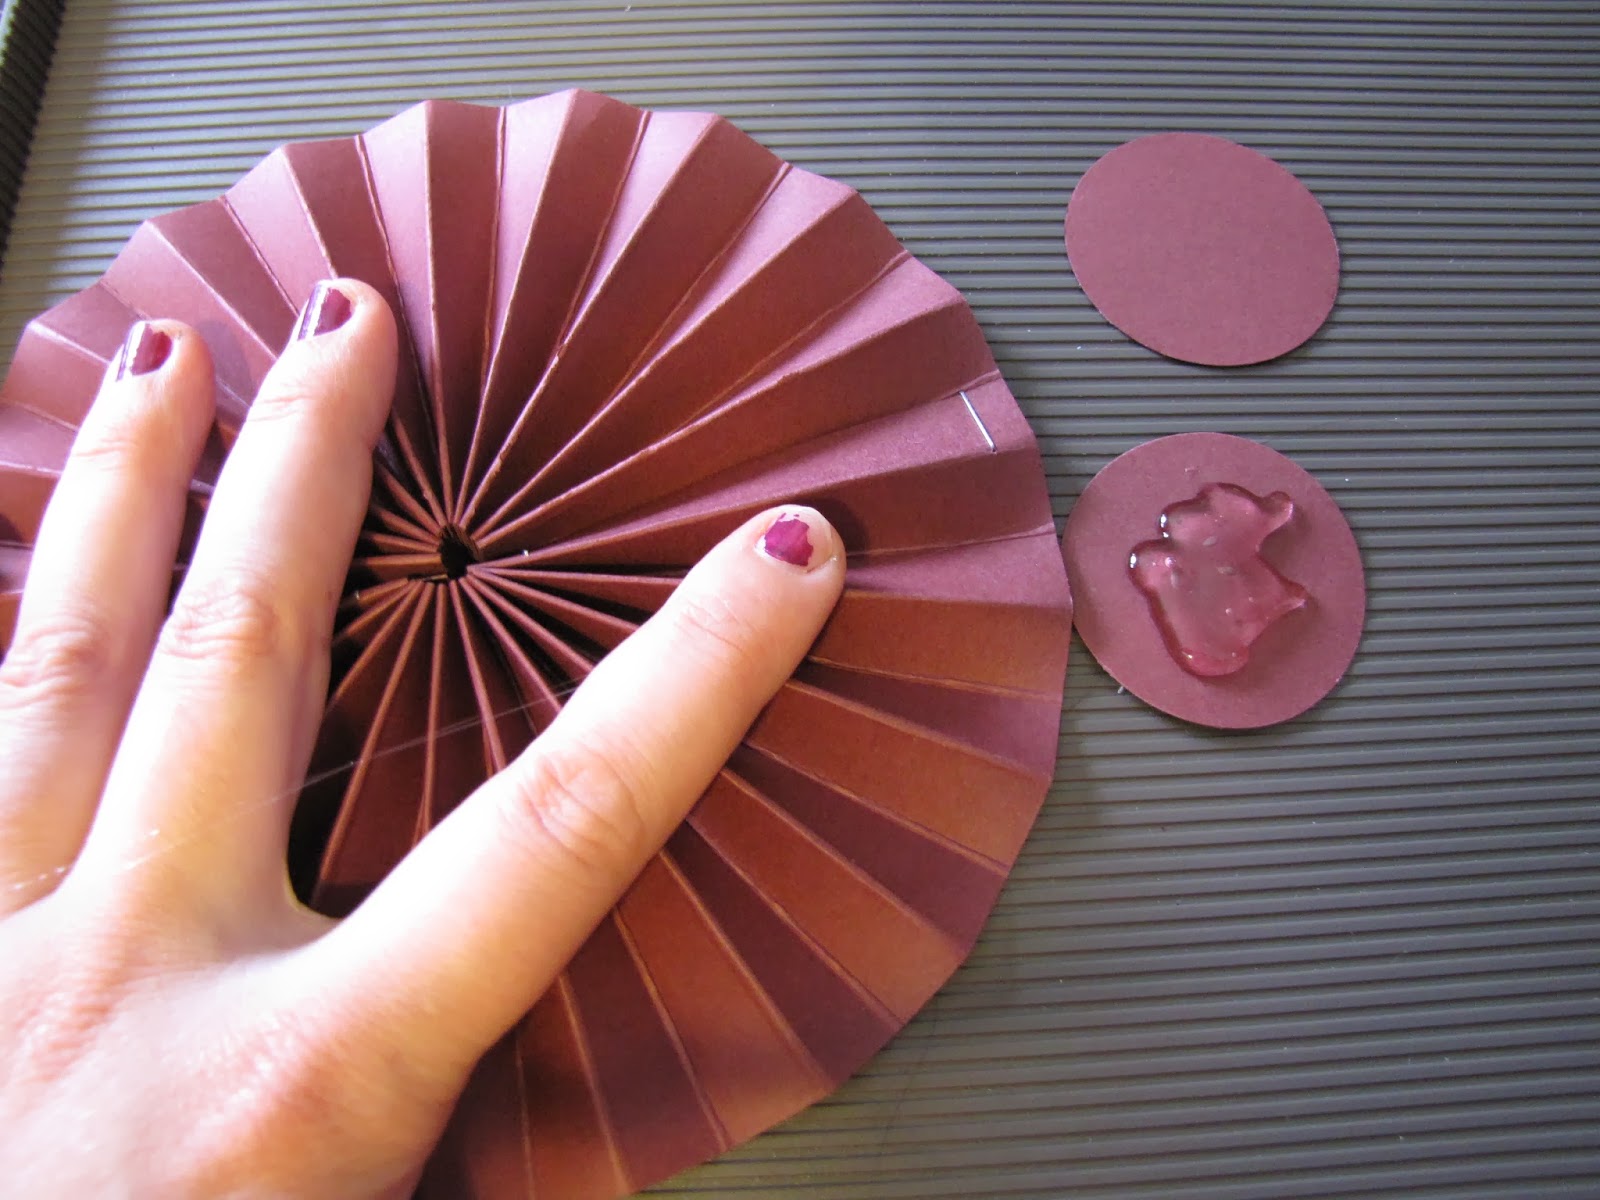
Step 5 - holding the medallion down with one hand,
hot glue circles on both the front and back
to make the medallion hold its shape.

After gluing them together, I was surprised how sturdy they were.
*I always glue smaller circles on my medallions,
then when I know what project I want them for,
I glue other things to the front & ribbon
or string to the back or through a hole in the top.

This banner was what I did for one of my medallion projects.

This is what I did for this project.
We made them in diffarent colors with an Africa map on one side
and a soul winning verse on the other.
Now that they are made we can use them for a multitude of things,
change the map or verses.
We could also paint them a differant color.
The possibilities are endless!!!
Now for the glorious globes-
these things are so fun to make and decorate.

Step 1 - print off your globe (look for the link below)
I printed mine off on craft colored cardstock.
Step 2 - score all of the folds & tabs.

Step 3 - use adhesive and follow directions
to put the top and bottom of your globe together.
Step 4 - *** BEFORE attaching the top to the bottom
be sure to attach a string for hanging through the top.
Then, attach the top to the bottom.

Step 5 - color or paint your globe
I used Sharpies, metalic markers
& then coated the whole globe with Modge Podge.
The MP gave it a nice glossy finish.

Helpful Hints to make this project:
~ I got the globe pattern from this site:
It was so easy to make and you can print it out on any paper.
~I prefer heavy cardstock or cereal boxes.
~The best thing to use for adhesive is the heavy double sided tape.
*Regular double slided tape only holds for a while.
You need to buy the "red stuff".
Mine is from Stampin Up, but I found some at the local craft shop.
Just go in and look for the double sided tape on a roll that is red.
This stuff will stick to anything and once you have it stuck there is no way to fix it,
so be careful as you adhere the pieces together.
- String for hanging both the medallions & globes should be long so that you can use it for anything.
You should also use clear fishing twine or a color that blends with the walls.
We have found that using pretty cord or string actually takes away from the beauty
of what you made and also makes it look cluttered.

As you can see, we grouped our marvelous medallions & glorious globes together
and then hung them at different lengths.
They made the perfect decor for our soul winning banquet!

No comments:
Post a Comment