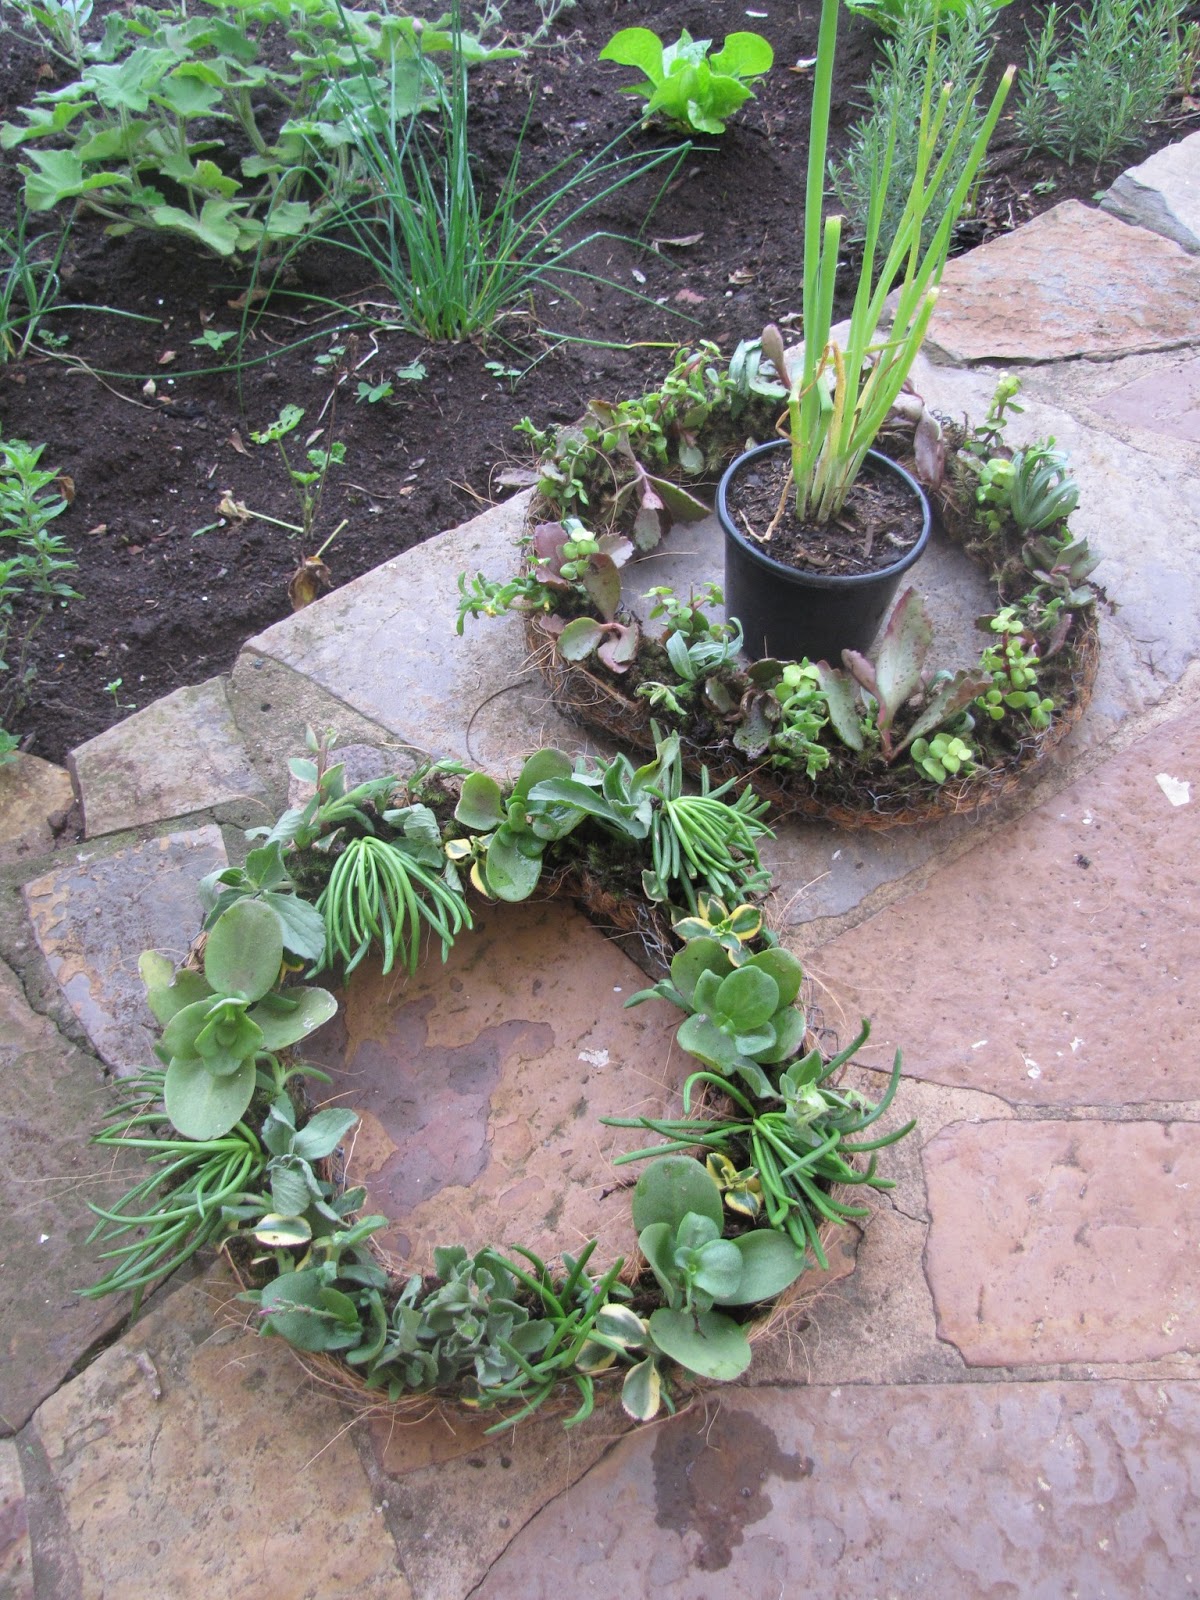
I went around their property and took small cuttings from plants
to make a wreath of my own.
When I got home and spread out my findings,
I was very happy with the variety that I had gathered.
The following are instructions for making a wreath,
along with my own commentary (I know, I always make some of you laugh).
Supplies needed:
- cuttings from various succulents
- chicken wire
- gloves
- wire cutters
- spaghnum and spanish moss
- bucket to soak moss
- wire
STEP #1: Allow your cuttings to dry out
Most of the instructions that I read
said to let your cuttings sit to dry out the stems for 2-7 days.
I did what the instructions said,
but really think that because of the tropical climate I live in,
I could have skipped this step and the next step.
STEP #2: Treat the cuttings with rooting hormone
This step, was to dip the ends in rooting hormone powder.
You have to be careful, because too much powder can cause the plant not to take root at all.
Like I said earlier, I would skip this step if you live in a tropical climate, like I do.
After dipping all of the stems, I separated my findings.
Meanwhile, I soaked my spaghnum moss in a bucket of water.
STEP #3: Soak the moss
While the moss was soaking, I formed my wreath base.
STEP #4: Form the wreath base
I used chicken wire for the base.
The base was made of two pieces of wire cut - 24 in. by 8 in.
I bent the wire on the edge of my work table to give it the "C" shape.
Then I formed each piece into a half circle.
The half circles were then fitted together into a wreath shape.
STEP#5: Place moss into the base
Most of my directions said to only use spaghnum moss,
but I added spanish moss into the wreath form first.
This helped the base to catch more water, as well as,
keeping the spaghnum moss from coming through the holes of the wire
(which can be a problem until the plant roots are intact).
STEP#6: Fill the base with spaghnum moss
For this step, I thickly packed the spaghnum moss into the wreath base.
Be sure it is packed well, so that when you start adding cuttings,
the moss will not fall out.
STEP #7: Be creative, plant your wreath!
Now for the fun part - arranging the cuttings!
Notice the variety of plants - large and small leaves.
There was also a nice combination of light and dark foilage.
STEP #8: Allow to sit out for the cuttings to take root
*It is important to let your wreaths sit flat like this for at least 2 weeks.
This step helps the plant cuttings to take root.
After I finished the first one, I sat it out to dry and then started another.
For this wreath I used the big spiky pieces,...
...added some small purple flowers,...
...and some differant leaf shapes.
I love how they all look together!
I actually made 3 wreaths that day
(sorry no picture of the third in the prep stage).
STEP #9: Wrap your wreath with wire
*Before hanging your wreath, wrap wire all the way around the wreath form.
 |
| Look closely at the wire wrapped around the wreath. |
This helps in two ways:
1) it keeps the cuttings that have not yet properly rooted in place,
2) it helps the wreath become more stable and keeps its form.
- - - - - - - - - - -
WREATH #1
During Christmas, this wreath hung outside my door.
- - - - - - - - - -
Wreath #2
Here is a simplified version of the first wreath.
- - - - - - - - - -
Wreath #3
The most beautiful wreath, has not found a home yet
(I am hoping to give it to my friends when they move. Shh, don't tell them.)
Tips for watering:
I live in a tropical climate, which means there is plenty of moisture in the air.
On hot weeks, I take my wreath down and soak it in water and then hang it back up.
At times when it is not so hot, I only soak the wreath once every 2 weeks.
During rainy season, God waters it for me!
One more look at all three wreaths ~
There you have it - my attempt to make beautiful living wreaths!
*The older your wreath is, the fuller it becomes.
Sounds like the Christian life, doesn't it?
The more mature we become in the Lord,
the fuller our life is.
That is why it is important to read God's Word, so that we can grow in Him.
2 Peter 3:18 " But grow in grace,
and in the knowledge of our Lord and Savior Jesus Christ..."
By growing in Him, out life becomes more "alive" and beautiful,
just like these living wreaths.
Who knows how much you can grow in one year.
Who knows how you can help others around you to grow in a year,
by investing time in prayer and Bible study with them.
Can't wait to see what my wreaths look like next year at this time!
Linking up to: